Create an Issue
Record a new issue — a defect, an NCR, a remedial item, or any point to watch — and assign it to the person who must resolve it.
Prerequisites: any project member can create an issue. Issue Type catalog must be configured in project settings.
Steps
-
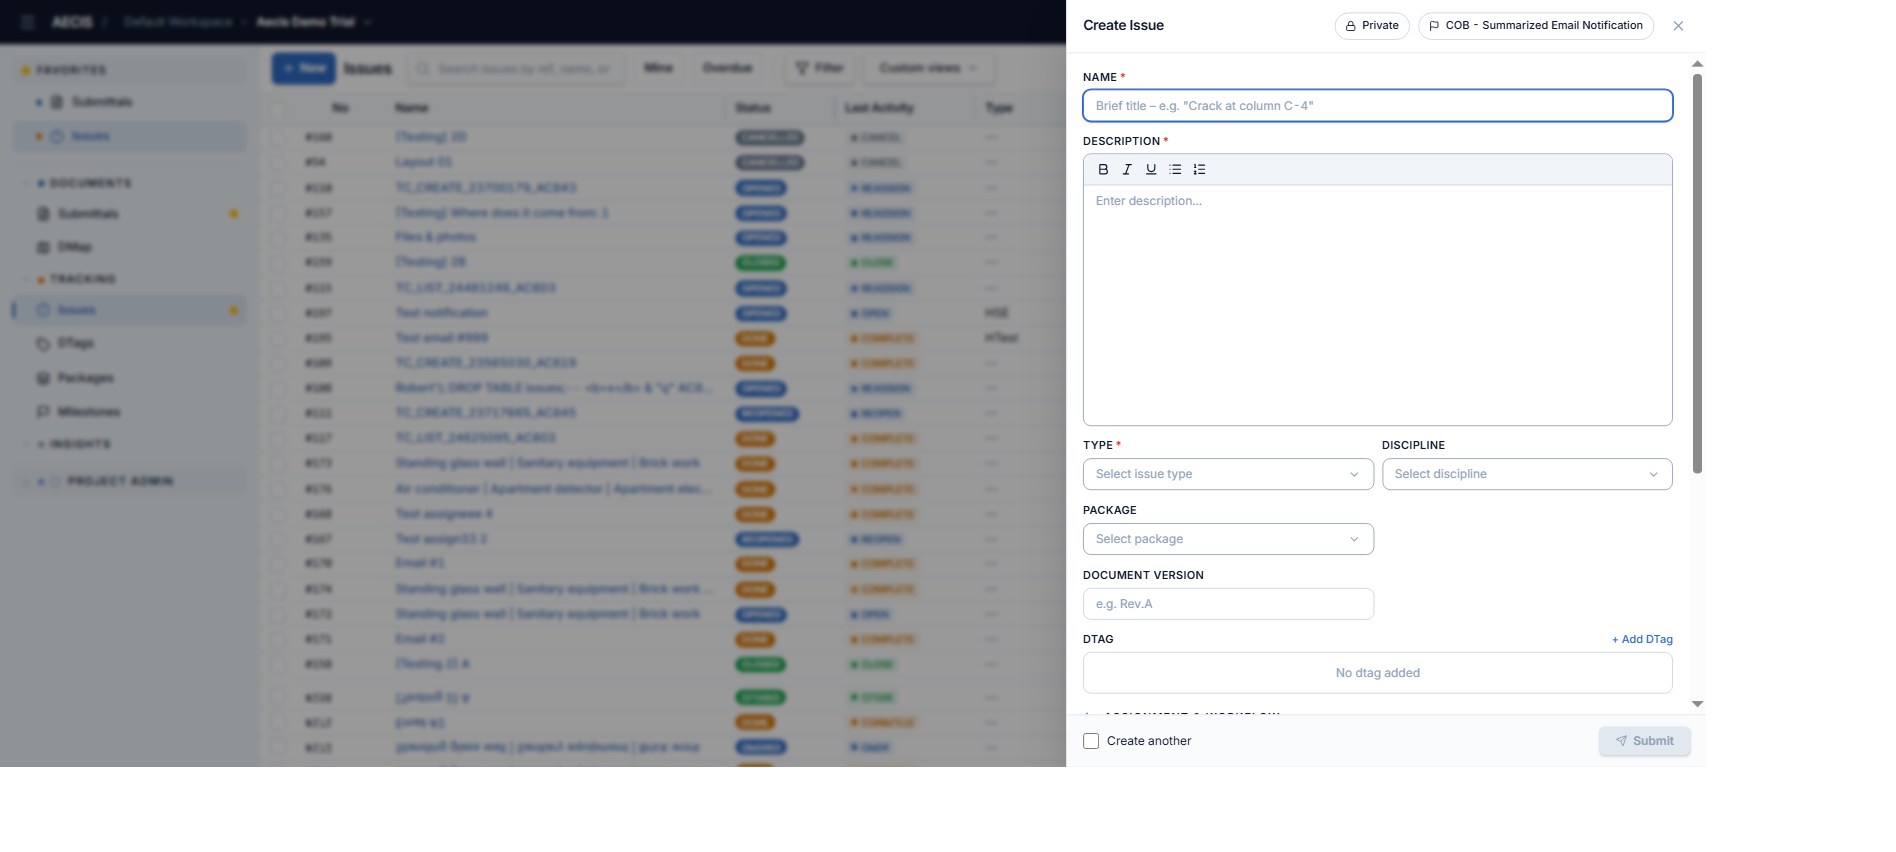
In the Issues list, click + New in the top-left of the toolbar. The Create Issue panel slides in from the right.
-
Fill in the general information:
- Name (required) — a brief title, e.g. "Crack at column C-4".
- Description (required) — supports rich text formatting.
- Type (required) — select from the project's Issue Type catalog.
- Discipline (optional) and Package (optional).
- DTag (optional) — click + Add DTag to attach the issue to one or more nodes of the project's DTag tree.
-
Scroll to Assignment & Workflow:
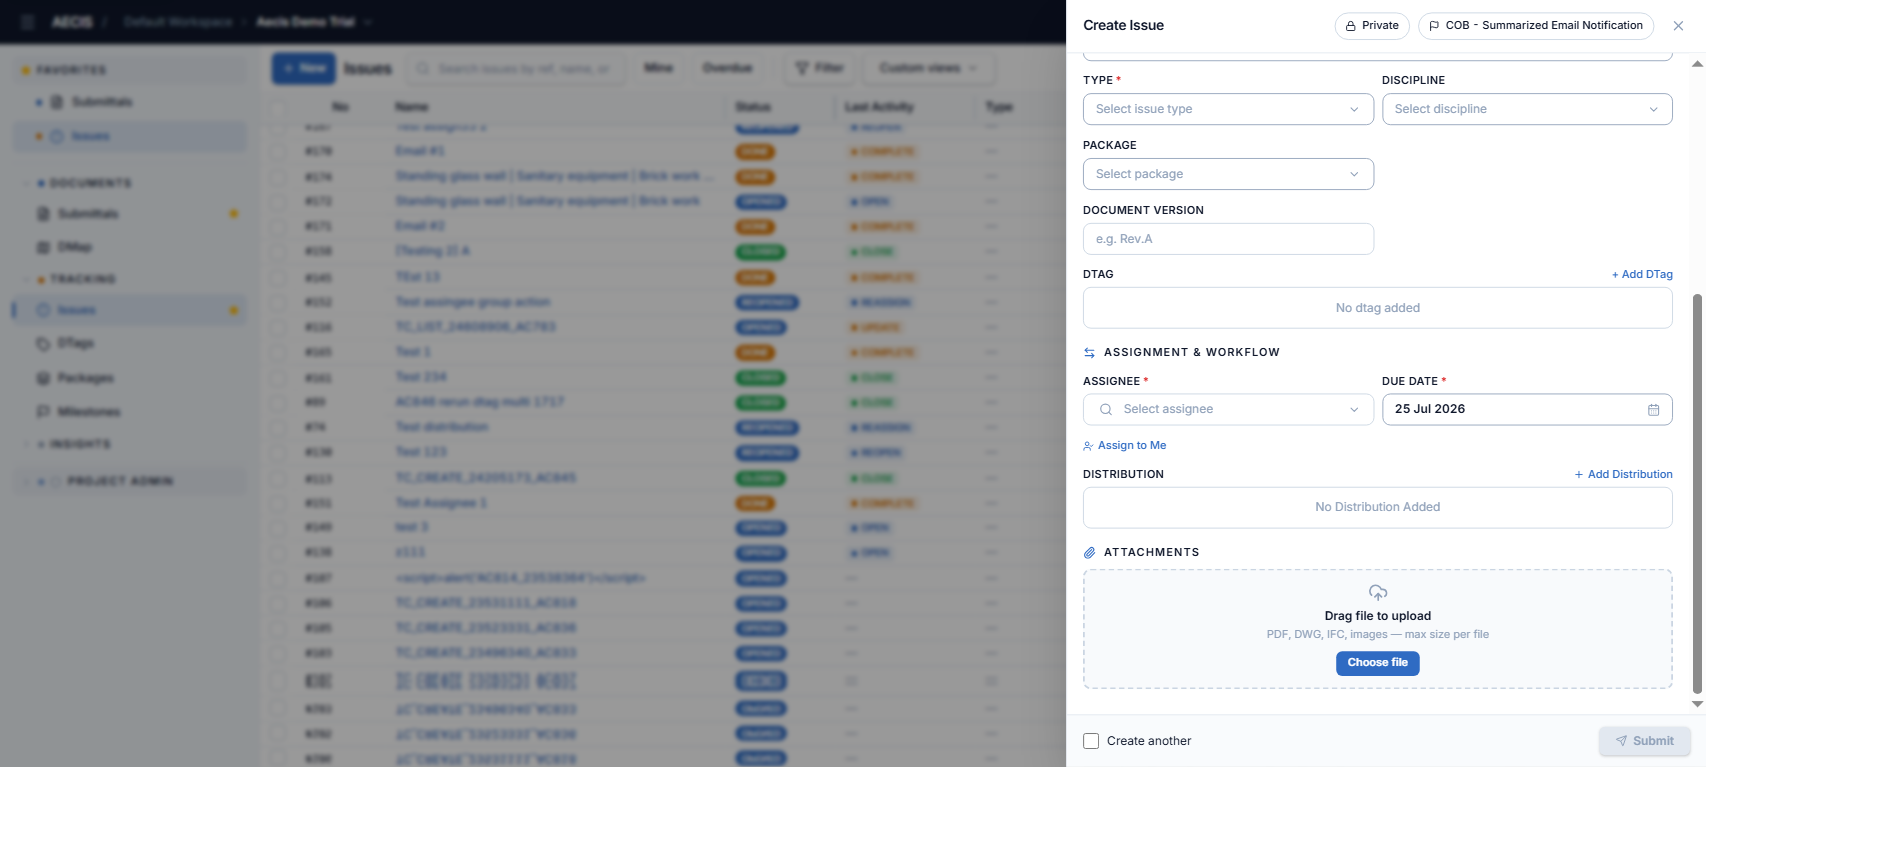
- Assignee (required) — the person who must resolve the issue. Use Assign to Me to assign yourself.
- Due Date (required) — must be today or later when creating.
- Distribution — the people who will receive email notifications about this issue. If your project has a default distribution list it is pre-loaded; click + Add Distribution to add more people or remove entries you don't need.
-
(Optional) Add attachments — drag and drop documents or photos (PDF, DWG, IFC, images), or click Choose file.
-
(Optional) Set the toggles at the top of the panel:
- Private — restricts visibility to the Creator, Assignee, and Distribution list. See Privacy.
- COB – Summarized Email Notification — delays this issue's creation email and batches it into one end-of-day summary per recipient. See Email Notifications.
-
Click Submit. The button is enabled only when all required fields are filled.
:::tip Create several issues in a row Tick Create another before submitting. After saving, the panel stays open and keeps your Type / Discipline / Package / Assignee / DTag / Distribution selections, clearing only Name, Description, and attachments — so you can enter the next issue faster. :::
What happens next
- The issue is created with status Opened and gets the next available number in the project (shown with a
#prefix, e.g.#178). - Unless COB was enabled, the creation email is sent immediately to the assignee and the distribution list.
- The issue appears at the top of the list (sorted by last activity date).
Validation errors
The system shows clear error messages if:
- Name, Description, Type, or Assignee is missing.
- The due date is in the past.